Notifications iOS
Configure Push notifications and In-app notifications
Configure push notifications via Helpshift
Helpshift enables you to send notifications to your users. This is particularly useful when you have multiple users on multiple platforms like iOS and Android. Notifications are useful to tell your users when you reply to an issue that they submitted. When the app is backgrounded, the notification that is sent from Helpshift appears as a badge or sound alert or both and appears with the App icon in the iOS Notification Center.
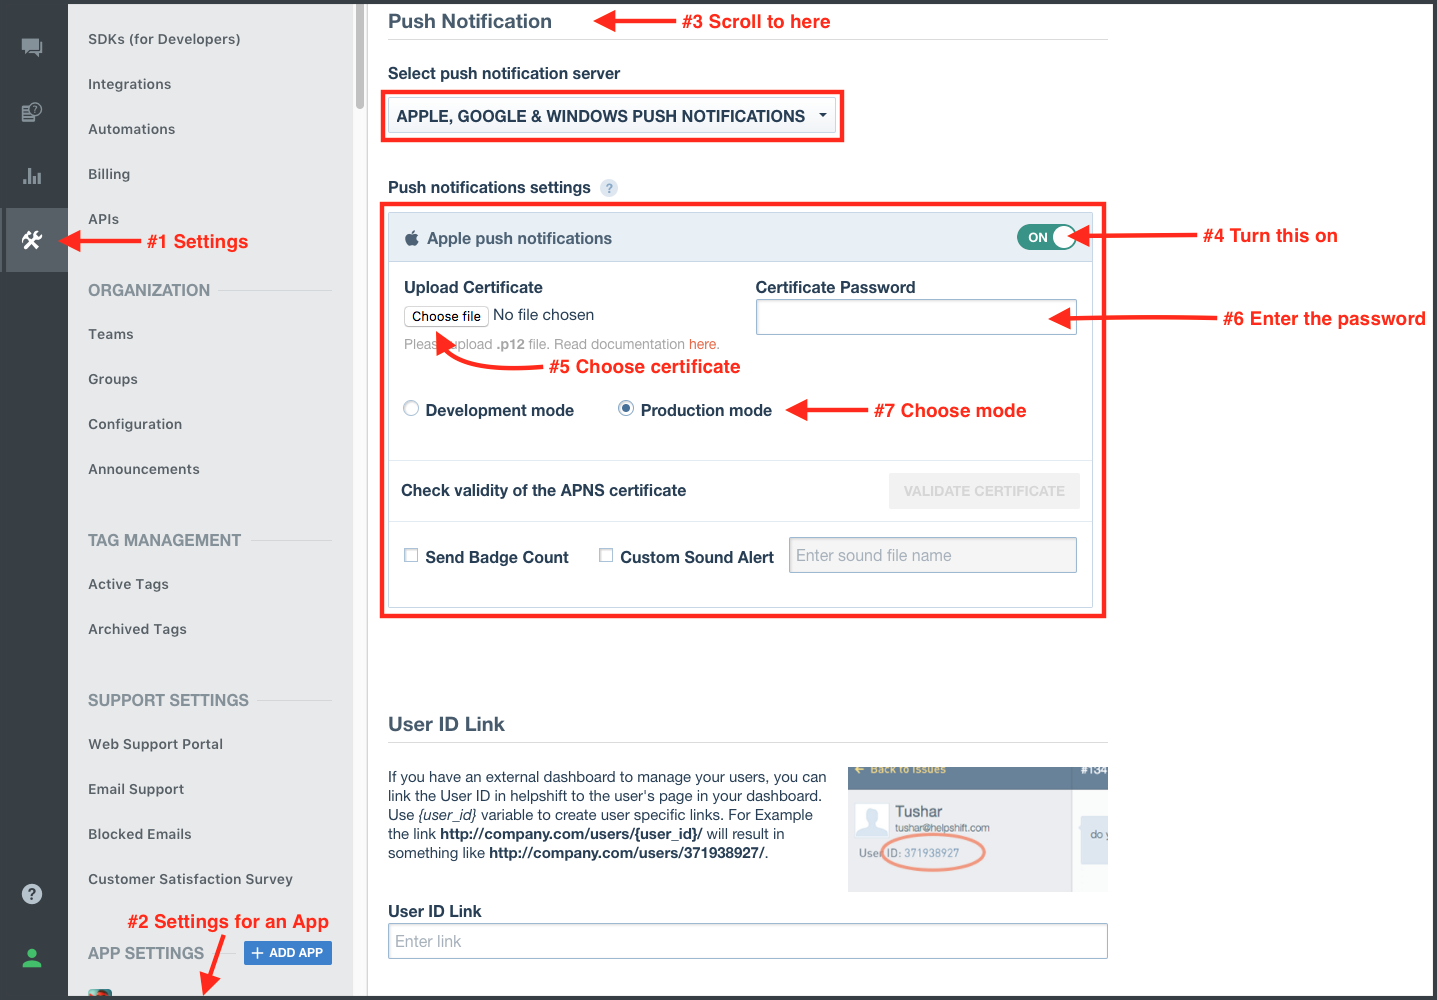
Configure Helpshift's push notification service in the Helpshift admin interface
Set up your application with Apple and enable push notifications. Download the Push Notifcation Certificate from Apple's developer portal, and double click on it to import it to the Keychain Access application.
In the Keychain Access application right click on the certificate that
was just added and click export it in .p12 format. Please provide a
password while exporting the certificate (We do not accept empty
passwords). Note that if your development private key is not present in
Keychain Access you will not be able to export it in .p12 format. Once
you have exported the .p12 file you can login and upload that file in
your app settings in the Helpshift admin panel. Provide the same
password you used while exporting to .p12 format.

Set the Production / Development mode options, depending on whether your Apple push certificate was for testing (development push) or production. You can configure whether to send a badge or not, and sound alerts if you provided custom sounds bundled with your app to handle notifications. Save it and you're all set.
Configure the Helpshift Xamarin SDK to handle notifications
When push is not configured, Helpshift SDK shows out-of-the-box "in-app notifications" for every message sent by Agents/Bots.
You should call RegisterDeviceToken() API only after you have configured the Helpshift dashboard for push notifications. Calling the RegisterDeviceToken() API without configuring the Helpshift dashboard will stop showing out-of-the-box "in-app notifications" for the end users.
- Using UILocalNotification Framework
- Using UNUserNotification framework
In order to receive push notifications from the Helpshift backend servers,
you will need to invoke the HelpshiftApi.HelpshiftCore.RegisterDeviceTokenapi call inside the
application delegate method
RegisteredForRemoteNotifications
In your app delegate file it will look something like this:
public override void RegisteredForRemoteNotifications(UIApplication application, NSData deviceToken)
{
    HelpshiftCore.RegisterDeviceToken(deviceToken);
}
Whenever a push notification is received, the application delegate
DidReceiveRemoteNotification gets called. Developers should check the
"origin" field of the notification dictionary and call 'HelpshiftCore.HandlePushNotification' api if the origin of the notification
is "helpshift". The Helpshift SDK will check issue for which the
notification was received and will launch the chat screen for that issue
automatically.
Whenever a push notification is received and the app is not active, i.e. it is in killed state, on tapping the notification,
FinishedLaunching delegate gets called and then DidReceiveRemoteNotification gets called. There are two different APIs for
handling push notification. From FinishedLaunching, you need to call the
HandlePushNotification(object notification, bool isAppLaunch, UIViewController vc) API. To avoid calling the push handler APIs
from both FinishedLaunching and DidReceiveRemoteNotification, you need to use a bool flag (this flag can be a member of
the AppDelegate class), as shown in the code below :
Example usage:
public override bool FinishedLaunching(UIApplication application, NSDictionary launchOptions)
{
    // Your code

    //  Check if the app is launched through a push notification
    if (launchOptions != null && launchOptions.Keys != null && launchOptions.ContainsKey(new NSString("UIApplicationLaunchOptionsRemoteNotificationKey")))
    {
        NSDictionary userInfo = launchOptions.ObjectForKey(new NSString("UIApplicationLaunchOptionsRemoteNotificationKey")) as NSDictionary;

        //  Check if the notification belongs to Helpshift
        if (userInfo.ObjectForKey((NSString)"origin").IsEqual((NSString)"helpshift"))
        {
            // Set the boolean flag to 'true' (This flag can be a member of the AppDelegate class)
            pushHandledFromFinishedLaunching = true;

            // Get the top view controller
            var window = UIApplication.SharedApplication.Delegate.GetWindow();
            var vc = window.RootViewController;
            while (vc.PresentedViewController != null)
            {
                vc = vc.PresentedViewController;
            }

            // Call the push handler API
            HelpshiftCore.HandlePushNotification(userInfo, true, vc);
        }
    }

    //  Your code
}

public override void DidReceiveRemoteNotification(UIApplication application, NSDictionary userInfo, System.Action<UIBackgroundFetchResult> completionHandler)
{
    NSObject originVal = userInfo.ObjectForKey((NSString)"origin");

    // Check if the notification belongs to Helpshift
    // Check if it was not handled from FinishedLaunching
    if (originVal != null && originVal.IsEqual((NSString)"helpshift") && !pushHandledFromFinishedLaunching)
    {
        // Get the top view controller
        var vc = application.KeyWindow.RootViewController;
        while (vc.PresentedViewController != null)
        {
            vc = vc.PresentedViewController;
        }

        // Call the push handler API
        HelpshiftCore.HandlePushNotification(userInfo, false, vc);
    }

    // Reset the boolean flag (This flag can be a member of the AppDelegate class)
    pushHandledFromFinishedLaunching = false;
}
For the Helpshift SDK to work with the Helpshift push notification service, you will need to invoke the HelpshiftApi.HelpshiftCore.RegisterDeviceTokenapi call inside of the application delegate method RegisteredForRemoteNotifications. In your app delegate file it will look something like this:
public override void RegisteredForRemoteNotifications(UIApplication application, NSData deviceToken)
{
    HelpshiftCore.RegisterDeviceToken(deviceToken);
}
To respond to the delivery of notifications, you must implement a delegate for the shared UNUserNotificationCenter object. Your delegate object must conform to the IUNUserNotificationCenterDelegate protocol, which the notification center uses to deliver notification information to your app:
- If a notification arrives while your app is in the foreground, UNUserNotificationCenterDelegate's
WillPresentNotificationis called. - The system does not call the
WillPresentNotificationmethod when your app is in the background or is not running. In those cases, the system alerts the user according to the information in the notification itself. When the user selects an action from the notification interface, the system notifies your app of the user's choice. To receive responses, your delegate object must implement theDidReceiveNotificationResponsemethod.
In all of the above cases, you should check the "origin" field of the notification dictionary and call the appropriate API (as mentioned below) if the origin of the notification is "helpshift". The Helpshift SDK will check Issues for which the notifications were received and will launch the Conversation screen for those Issues automatically. The isAppLaunch boolean flag here is used to distinguish between an active or backgrounded app vs. an app that was killed by the user. In the latter case, this flag should be set to true.
Example usage:
For the WillPresentNotification callback of IUNUserNotificationCenterDelegate
public void handleHelpshiftNotification(NSDictionary userInfo, bool isAppLaunch)
{
    var vc = UIApplication.SharedApplication.Delegate.GetWindow().RootViewController;
    while (vc.PresentedViewController != null)
    {
        vc = vc.PresentedViewController;
    }
    HelpshiftCore.HandlePushNotification(userInfo, isAppLaunch, vc);
}

public void WillPresentNotification(UNUserNotificationCenter center, UNNotification notification, Action<UNNotificationPresentationOptions> completionHandler)
{
    if (notification.Request.Content.UserInfo.ObjectForKey((NSString)"origin").IsEqual((NSString)"helpshift"))
    {
        pushHandledFromFinishedLaunching = false;
        handleHelpshiftNotification(notification.Request.Content.UserInfo, false);
    }
    completionHandler(UNNotificationPresentationOptions.None);
}
For the DidReceiveNotificationResponse callback of IUNUserNotificationCenterDelegate
public void DidReceiveNotificationResponse(UNUserNotificationCenter center, UNNotificationResponse response, Action completionHandler)
{
    if (response.Notification.Request.Content.UserInfo.ObjectForKey((NSString)"origin").IsEqual((NSString)"helpshift"))
    {
        HelpshiftCore.HandleNotificationResponseWithActionIdentifier(response.ActionIdentifier, response.Notification.Request.Content.UserInfo, completionHandler);
    }
}
In-app notifications
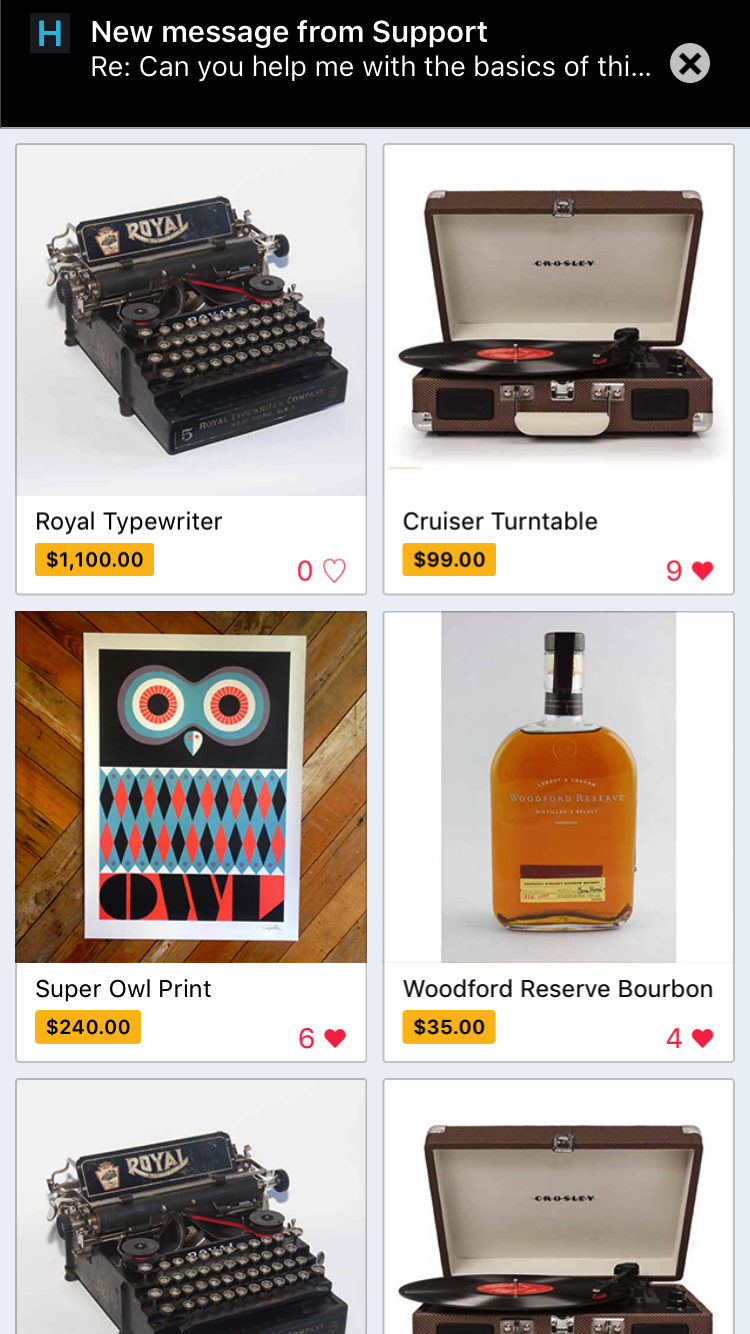
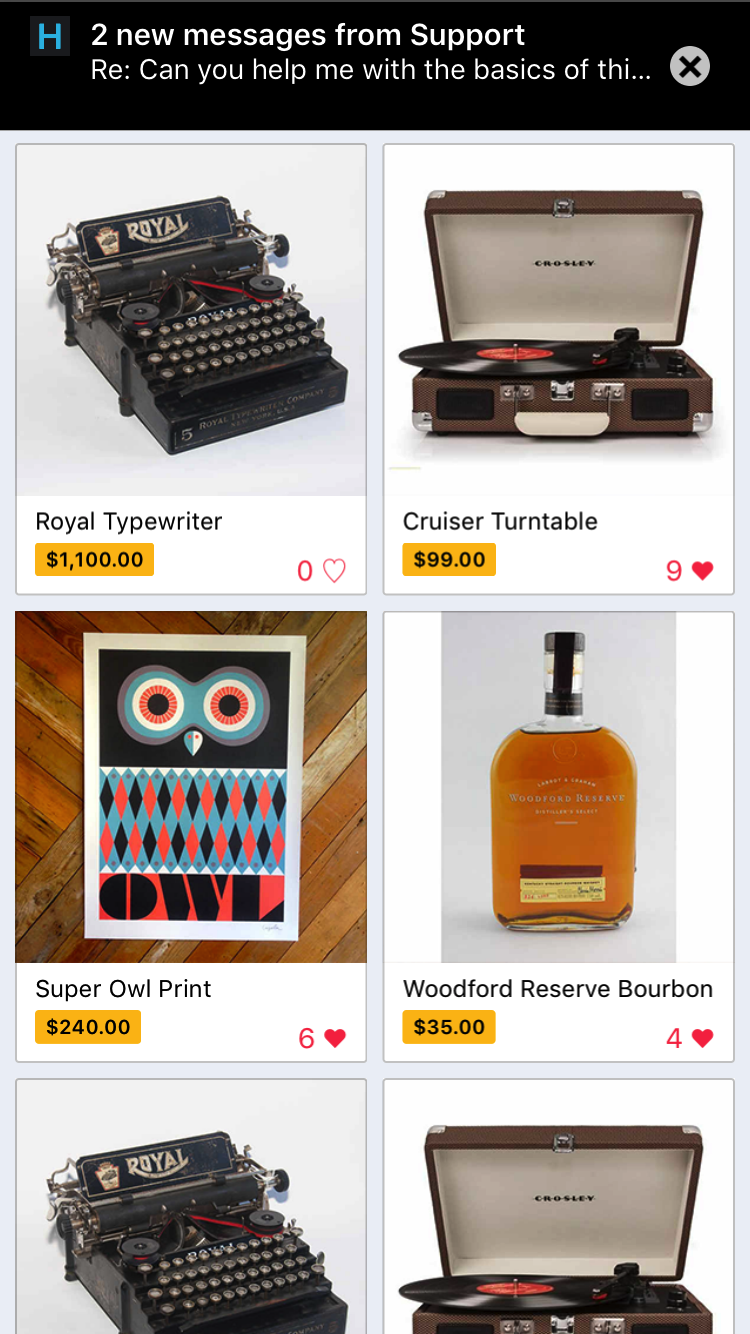
In-app notifications are similar to Apple's push notification banners. Unlike push notifications, they appear within your app when it is in use by the user.
These notifications are sent when an agent replies to a customer's issue. Your customers can click on these banners to go straight into the conversation screen.


Configuring In-app notifications
If you do not want the in-app notifications support provided by the
Helpshift SDK, please set this flag to false. The default value of this
flag is true i.e in-app notifications will be enabled.
Read more about in-app notifications in the Notifications section.
- Using HelpshiftInstallConfig
- Using Dictionary
| Flag | enableInAppNotification |
| Values | true / false |
| Default | false |
Example:
HelpshiftInstallConfig installConfig = new HelpshiftInstallConfig.Builder()
                                         .SetEnableInAppNotifications(true)
                                         .Build();
HelpshiftApi.HelpshiftCore.Install("<YOUR_API_KEY>",
                                   "<YOUR_COMPANY>.helpshift.com",
                                   "<YOUR_APP_ID>",
                                   installConfig);
| Flag | enableInAppNotification |
| Values | "yes" / "no" |
| Default | "no" |
Example:
    Dictionary<string, object> config = new Dictionary<string, object>();
    config.Add("enableInAppNotification", "yes");
    HelpshiftCore.Initialize(HelpshiftApiProviderType.HelpshiftApiProviderTypeSupport);
    HelpshiftApi.HelpshiftCore.Install("<YOUR_API_KEY>",
                                       "<YOUR_COMPANY>.helpshift.com",
                                       "<YOUR_APP_ID>",
                                       config);
Showing notification count when replies are sent to the user
Via Helpshift API
If you want to show your user notifications for replies sent by an Agent to their open Issues, you can use notification counts provided by the Helpshift SDK. These notification counts give you the total number of unread messages and display it as a badge. You can get notification counts asynchronously by implementing the Helpshift delegate method "DidReceiveUnreadMessageCount" . Notifications are typically displayed as badges inside your app where a user clicks on the help section. These badges can be displayed anywhere in your app's interface to tell the user that they have unread replies/messages from you.
For example
HelpshiftApi.HelpshiftSupport.RequestUnreadMessagesCount(false);
If you want to fetch the notification count from the server, you can call the RequestUnreadMessagesCount API with a true param value.
For example
HelpshiftApi.HelpshiftSupport.RequestUnreadMessagesCount(true);
You will receive the callback with the notification count in the delegate registered using HelpshiftSupport.SetDelegate() api in DidReceiveUnreadMessagesCount method.
Refer Support delegates. The notification count here can be fetched either from the cache or from the Helpshift servers, the count from Helpshift’s servers is rate limited and it returns the value only if a subsequent call is made to the API, after the reset timeout or when the user just closes the chat screen (whichever is earlier). For an active issue, the reset timeout is 1 minute and 5 minutes for inactive issues.